Add Communication Tags (Tutorial)
In most applications, your first tag will be a Context tag. These can provide organization for your application. A Context tag can represent a site, equipment such as a pump or generator, or anything else.
If the Context represents a site or station, then typically, the communication tags are added below it, as you will do in the following exercises.
The following exercise assumes that you have completed all the tutorial lessons prior to this in the menu. If so, ignore this note and continue.
If not, you can still do this exercise. Load the Training Simulator, as described in Add Applications (Tutorial). Navigate to the Sample Pages >> Demo Page and follow the instructions there to enable the Demo System tags. You will need to make adjustments in the exercise steps since the path to the tags won't be the same, and the Demo System has been built to a state that may not match that of the previous chapter in this tutorial.
Ensure that the Training Simulator application is running while you work through the tutorial.
Create a Context tag
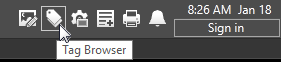
- Open the Tag Browser.
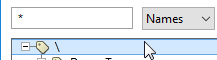
- Ensure that the top-level tag (backslash with no name) is selected in the left window.
- Select New.

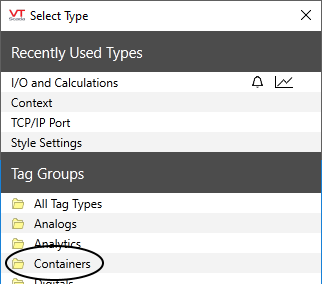
In the Select Type dialog, the type that you want to create, Context, might be in the default list of "Recently Used Types". But, you can't count on that so this exercise will go about finding it the long way. - Expand the Containers group.
- Click on the Context type to select it.
You should now be looking at the ID tab of a new Context tag. - Name this tag, Station 1
- In the area field, type Northern
- Describe the tag as Storage and pumping
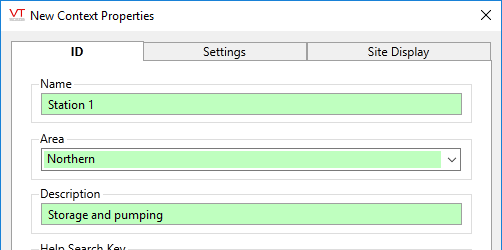
Note that fields turn green as you edit. This helps you keep track of what changed.
- Do not set a help search key or a type at this time.
- Click OK.
The tag should now be included in the Tag Browser list.
Your station needs to communicate with hardware. In this example, you will link to a built-in simulator, but the concepts are the same. The port tag tells VTScada where to find your hardware.
Create a port tag
- Open the Tag Browser (if it isn't already open).
- Right-click on Station 1, then select New Child from the menu that opens.
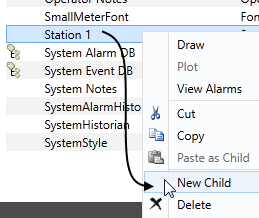
Right-click the tag, then select New Child from the menu
- In the Select Type dialog, expand the Ports group, then select TCP/IP Port.
- Name this tag, Sim Host
(simulator host) - Describe it as Network connection
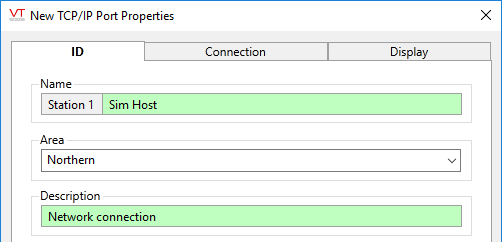
The configured ID tab. Note that the area was inherited from the parent Context tag.
- Open the Connection tab.
- Enter the TCP/IP address as 127.0.0.1 and the port as 501
The port is "localhost" (i.e. your computer) since this will talk to the built-in simulator. The port is different from the standard for a Modbus Compatible driver. This is done to ensure that the simulator does not interfere with any real connection you might create later.
- Select OK to save your work.
To see a list of standard port numbers for common drivers, press F1 while viewing the Connection tab of the TCP/IP Port tag.
The driver tells VTScada what protocol (language) the hardware uses. The simulator to which you will connect in this tutorial uses a Modbus Compatible driver.
Create a driver tag
In this application, the driver will be created as a sibling of the port.
- Right-click on Station 1, then select New Child from the menu that opens.
- In the Select Type dialog, open the Drivers group then find and select Modbus Compatible Device.
- Name the driver, CommChannel
- Set the description to Simulator connection
- Open the Options tab.
- In the Comm Channel section, select Open Modbus TCP.
- Open the Serial tab.
- Click the browser button beside the Port field
A new instance of the Tag Browser opens. (The first remains open in the background.) - Select the port tag, Sim Host,
- Click the Select button.
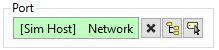
(Alternatively, you could have right-clicked on the port tag then chosen Select from the menu that opened.) - Ensure that the Port field now looks like the following, then click OK.
- Close the Tag Browser.
Bonus Step - Deploy Changes
If the Automatically deploy... feature is turned off, as described in Properties (Tutorial) then you now have local changes that are ready to deploy. The steps you have just completed will be needed in all other chapters of this tutorial, so it's a good idea to deploy them. Do so as follows:
- Look at the top of the page for the symbol indicating undeployed changes:

- Click that symbol.
A comment dialog titled "Deploy All Changes" will open. - Type a comment.
- Click OK.
In future exercises, if you make a mistake and want to back up, you can do so as follows:
- Open the Application Configuration dialog.
- Click on Revert Changes in the side menu.
- In the Revert Changes page, click the Revert button at the lower right.
This will take the application back to the state it was in after the last time you deployed changes. That might be quite a few steps back if you do not deploy your changes from time to time.
Ready to continue? Open Digital I/O Tags (Tutorial)
