
This dialog shares many features with the one used to add a new property. There are two reasons to copy a property:
- To create a local copy of an OEM property, which you may then change for the current application.
- To set a workstation-specific value for a property.
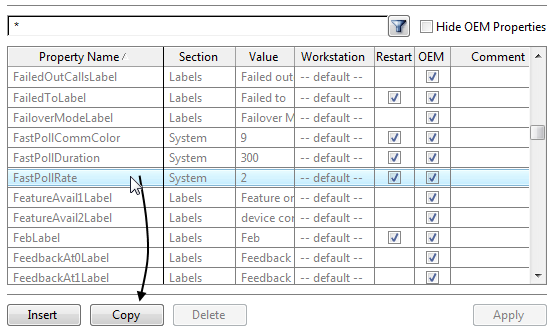
In the Edit Properties dialog, you will notice that a few properties are shown using a bold font while most are displayed using a faint gray shade. Those shown in a faint gray color are properties whose value has been set in one of the application's underlying OEM layers. (If the Hide OEM Properties option is selected, only local properties are shown.)
A property set in the current application takes precedence over a property set in an OEM layer. The same property cannot be set twice in the application, within a section and having the same workstation name.
- Open the Application Configuration dialog.
- Ensure that the Hide OEM Properties box is not selected.
- Find and select the property whose value you want to change.
See: Sort and Filter the Application Property List for shortcuts.
- Click on the Copy button.
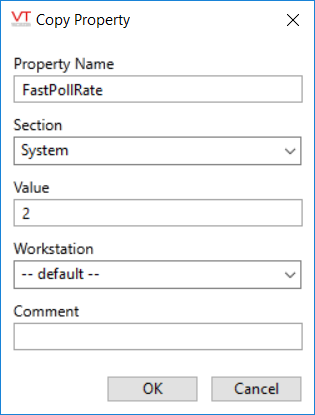
The Copy Property dialog will open.
The Copy Property dialog enables you to change all fields. Note that unknown property names are ignored. Properties attached to the wrong section are likewise ignored.
- Change the Value as required for your application.
- [optional] If the copied property is meant to be in effect for only a particular workstation, type the name of that workstation in the field provided.
- [optional] Alter the comment field to provide a reminder note to yourself, explaining the reason for the new value.
- Click OK.
The dialog closes. Note that the new property will not be saved until you apply your changes.
- Click Apply.
If the property is one that requires an application restart before it goes into effect, you will see the following warning:
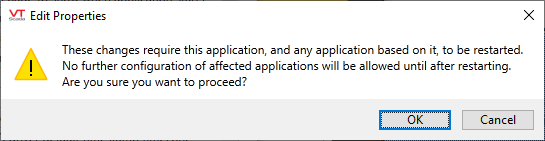
- Click on OK unless you would like to make other configuration changes before proceeding with this one.
The Comment dialog will appear.
- Type a comment into the Comments dialog and click OK.
If you later use the VTScada controlled versioning system to review the changes made to your application, this comment will help you remember what changes were made and why.
- The new value has no effect.
Check that the property name is spelled correctly and that a legal value has been assigned.
Check that the property has been declared in the correct section.
Ensure that comments are not included on the same line as the property declaration.
Ensure that the file changes have been imported.
If the property requires a re-start, shut down the application and re-start it.
- Save time when looking for a property.
- Structure and location of the files affecting an application.
- Error dialog description.
Copy a Property - Make a local copy of an OEM property, with its own value.
Change a Property's Value - Control the appearance or behavior of your application.
- Have a different appearance or behavior from one workstation to another.
